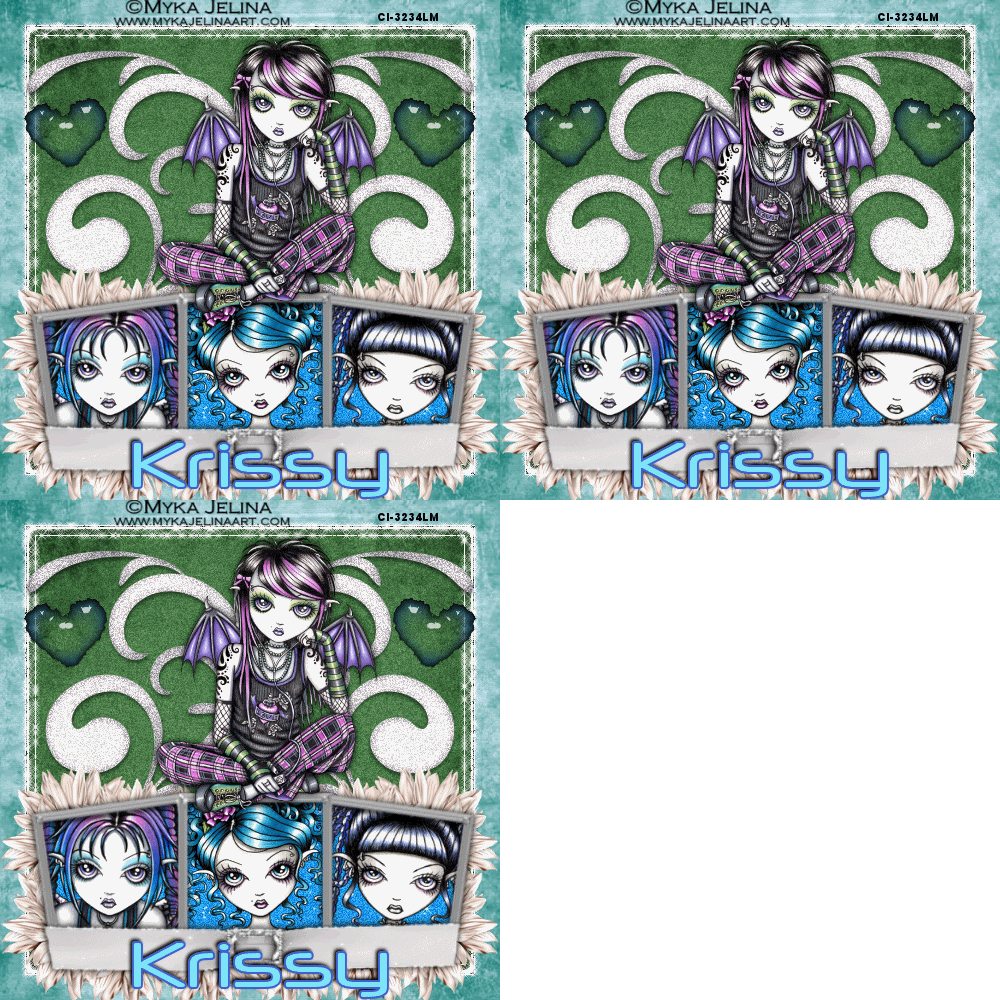
This Tutorial was written by me, Angel Flower, from my own ideas. Any similarities to others is coincedence. All my tutorials are registered with TWI.
For this tutorial you will need four tubes of choice. I am using the work of Myka Jelina. You must purchase a license from CILM, http://www.cilm.com/, to use her work.
Scrapkit. I am using a PTU kit called Jewels of the Soul Birthstone Kit by Krissy from GigglyGirlScrapz. You can purchase the kit here http://www.poisonedprincess.com/
New image-600x600, Transparent.
Paste a paper as a new layer. This will be our background paper. Go to image resize, about 85%, all layers unchecked. If it is still too big for your, repeat this step till it is the right size.
You can use this method anytime something needs to be resized. If resizing makes your paper too small then use the edit to undo and just leave
it as is. Or, if you prefer, you can always use the pick tool, the little arrow, and then drag the box with one of the corners till it is the right size, just becareful not to distort the image.
Paste another paper as a new layer and resize so it is smaller than the background paper. We want it to look like our background paper is bordering this paper.
Paste a triple frame or three single frames along the bottom of the tag. Resize it so it fits inside the top paper.
Pick another paper for the inside of the frames and paste as a new layer.
Grab your magic wand tool, mode-add, match mode-rgb, tolerance-20, feather-0.
Click inside each of the frames, go to selections-modify-expand by - this will be anywhere between 3 and 10 depending on the type of frame used. I had to used 7 for mine.
Now make your paper for the frames the active layer and go selections invert, and hit delete. Select none. You should now have the paper showing only through the frames.Move this layer below the frame layer.
Now paste one of the tubes as a new layer and resize as needed and position so that the face shows through one of the frames.
Repeat this step for the other two parts of the frame using different tubes. Make sure all three tube layers are below the frames layer.
Get the magic wand, same settings as before, and again click in the center of each frame and go to selections-modify-expand by 7 or whatever you used before.
Now go selections invert. Click on the first tube layer and hit delete, then click on each of the other two tube layers and hit delete for each one. Select none. Now, if any bits from one of your tubes hangs over into the frame next to it, you will need to get your eraser brush with a size of about 16 and erase only those parts that hang over. You will have to make the layer with the parts you need erased active in order to do this.
Make your frame layer active and give it a drop shadow. I used, h+v-0,opacity-100, blur-10, color black.
Paste your main tube as a new layer and resize if needed. Place so that it looks to be sitting or laying on top of the frames.
Give it the same drop shadow.
Paste a doodle as a new layer. Resize if needed. position on one side of your tag within the smaller paper. Move this layer so it is just above the smaller paper layer. See my tag for reference.
Duplicate this layer by right clicking on the layer and choose duplicate. Then go to image, and mirror. You should now have one on each side of the tag.
Paste a heart element and resize it, place one on each side of the tag where you like or see my tag for placement.
Paste some flowers under the frame and frame paper layers around the edges so that they slightly stick out from under the frames. see my tag for reference.
Make your smaller paper layer active. Selections-select all. Selections float, then defloat. Make the background paper layer active, selections invert, and right click it and choose promote selection to layer. Select none. This is our border layer. Give this new layer a drop shadow of 3,3,100,10, and black. Then repeat changing the 3's to -3.
Now is the time if you wish to resize your whole tag to do so. Make sure this time that all layers is checked.
Once happy add your copyright info so it is clearly visible.
Add your name. Give it a drop shadow of choice.
Now you can save and leave as is or you can animate.
To animate
Merge your two doodle layers together by right clicking on the top one and choose merge down. Now duplicate twice so you have a total of three. On the top layer go to effects-plugins-dsb flux-bright noise-
40% and mix.
Now do the same to the remaining doodle layers clicking the mix button once each time.
Make the border layer we made active. Duplicate this layer twice also for a total of 3. This part might be tricky. Get your magic wand with same settings we used before. On the top border layer, Click where you see the drop shadow we applied on the border layer.
This should make only the shadowed edge of the border is selected and not the border itself. On the top layer go to effects-plugins-xenofex2-constellation-2-7-90-4-100-91-rotation 45-keep original image, click random seed once.
Repeat this for the other two border layers keeping the settings the same and clicking random seed once each time.
Now hide the bottom two border layers and the bottom two doodle layers by clicking the eye next to each of them.
Make one of the visible layers active. Go to edit-copy merged. Go to your animation shop. Go edit, paste as new animation.
Back in psp, hide the top border layer and top doodle layer and unhide the middle border layer and middle doodle layer. Again go to edit, copy merged.
Back to animation shop, go to edit, paste after current frame. Now go back to psp one more time. Hide both middle layers and unhide the last border layer and doodle layer. Edit, copy merged. And again in animation shop go to edit paste after current frame.
Now go to file save as, save it and you are done.
©Angel Flower October 2008
Friday, October 24, 2008
Myka's Gang
Posted by angel flower at 8:03 PM
Subscribe to:
Post Comments (Atom)


0 comments:
Post a Comment